
Even the best possible products can’t last forever, and no matter how good of care you take of them, sooner or later, tires will wear out. We all know that it is not the best of ideas to use our car with bad tires, so when we notice they are not in their best condition, we know it is time to change them. If you are able to take the car to a specialized shop, where you can both buy new ones and have them replace your old ones, that is great.
Of course, if you have time and money for something like that, but sometimes it is necessary to do this work at our house, with our own hands. If you are interested in purchasing some tires or want more information about them, just check out tiredealersites.com, but if you are interested in learning more about how you can remove a tire from the rim by yourself, we will further discuss this topic.
1. The equipment
So what is the first thing you need to know and prepare? Well, some equipment is necessary to have in order for this endeavor. Firstly, you will need some oil or other type of appropriate lubricant for this job, or otherwise, it is going to extremely difficult to remove the tire from the rim. We also require some tools to help us remove the core. Wrenches, screwdrivers, and pry bars, all of this is going to be needed before you can finish the task at hand. Once we are sure that we acquired everything that is wanted, we can continue with preparations.
2. Preparation
The initial step we need to take is selecting the best possible location for the job, and luckily, pretty much any area will be okay. What’s needed is some room to place the tire, and perhaps it would be ideal if it wasn’t in a position where the noise we are going to make would disturb someone. The next step is to prepare the tire. Place it where you plan to do all of the work and remove all of the bolts inside it, for which you can use any type of wrench. Of course, if the tire first needs to be removed from the vehicle, this has to be somewhere where we can park as well.
3. Deflate the tire
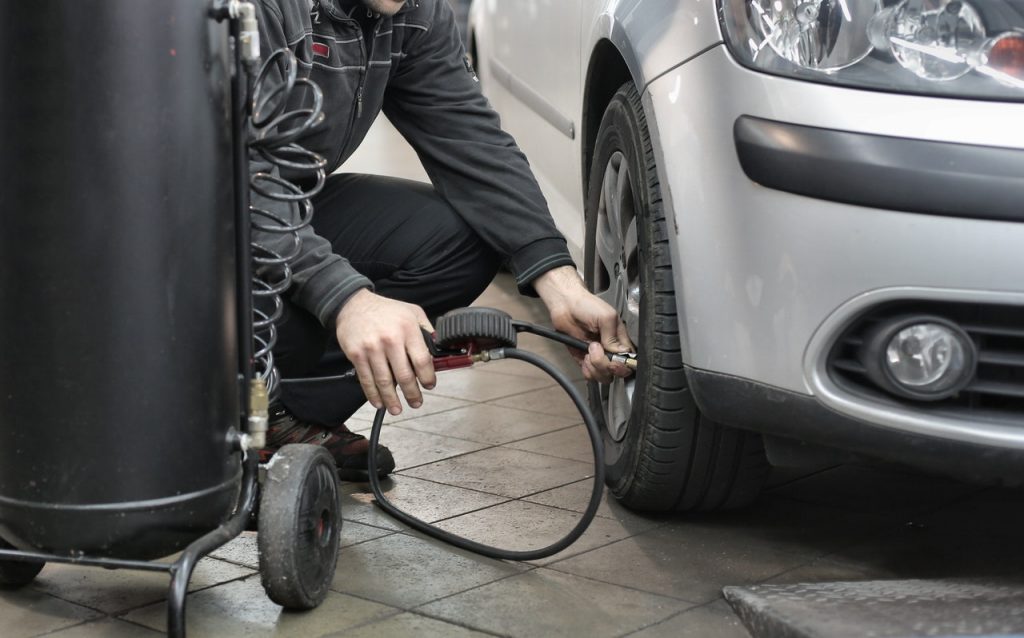
The next thing you need to get done is to deflate the tire. It is possible to try removing the tire without this step, but that would just make the job way too hard, and there is no need to make our life more difficult than it is already, so first, we deflate the tire. It is not that hard to find the ventilation lid, no matter if it is made from alloy or rubber. Then proceed to rotate the lid counterclockwise. That should do the trick in removing the core inside the ventilation mechanism. While you shouldn’t be afraid to use some force, it is also crucial to stay patient and do it slowly to avoid breaking the ventilation lid because it can make the deflation harder than it is.
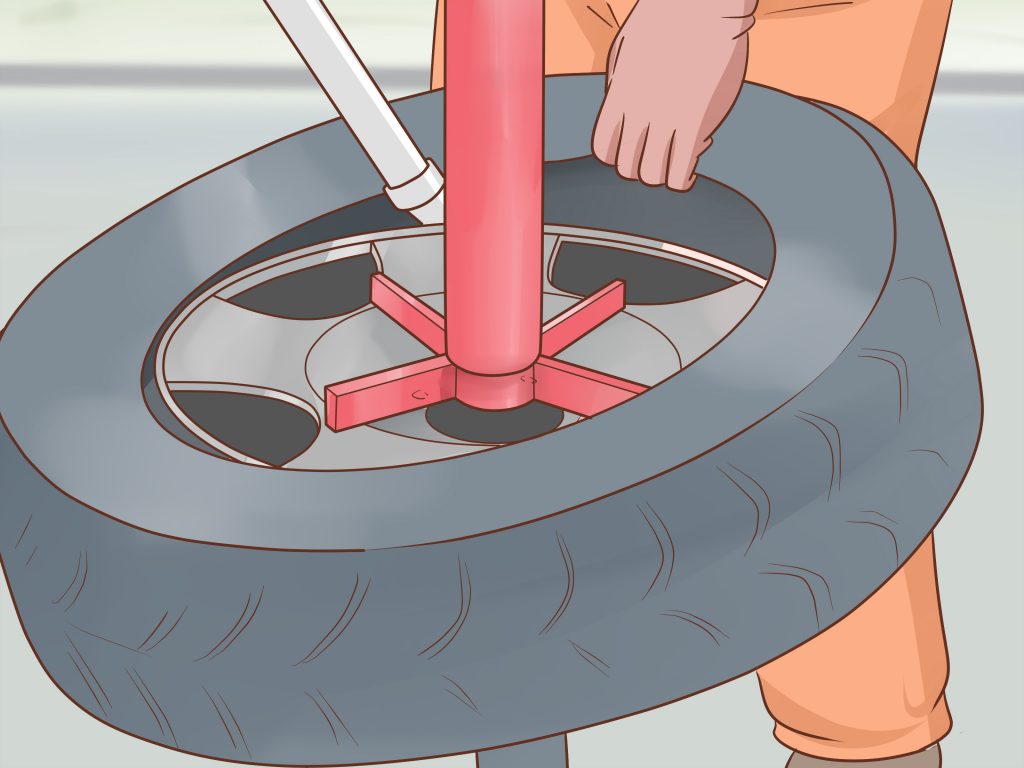
4. Divide the tire bead
After deflating, we need to divide the tire bead, and no matter what tire manufacturer we use, the bead will be connected to the tire in a very effective way. There are a few ways to take care of this issue, and cutting it off with a sharp tool is the one that has a one hundred percent success rate. There are several types of blades that you can use, and as long as they are sharp enough to cut through, it is all good. The best way to finish this is to cut down the stitching that goes with the bead, but be careful.
We don’t want to touch the metal part of the rim with our blade, and a nice little trick is to put something in the parts of the tire we have already cut. That will make it go much smoother. If you are interested in buying some specific equipment, consider purchasing a bead breaker tool. With it, separating the tire bead is the easiest thing in the world. Furthermore, this is the most secure way to perform this task. As long as money is not the problem and you want to have some specialized tools, this is the best possible approach.
5. Final steps
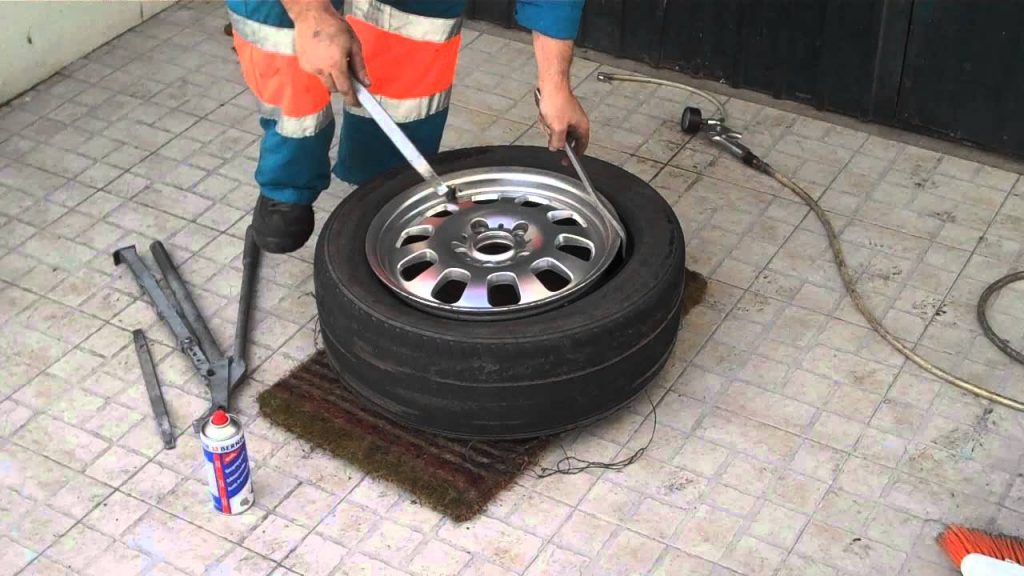
Once the tires are of the vehicle and on the ground, we need to separate them from the rim itself. Remember, the tires have the entire weight of our vehicle upon them, so it is not strange to find that the rim and the tires have become almost inseparable. That is why we said you are going to need some oil. Just place it where the connections are between these two, and it should be ready to go. When it comes to what amount should be used, that really depends from case to case, and one should use as much as it is necessary to separate them.
We have reached the final step in the instructions, and what is required for it is the pry bar and some force. Use the bar somewhere close to the edges of the rim. Some strength might be needed, but not too much of it. The last thing is to take the screwdriver and use it throughout the rim while the tire is held in the same position. Once you are done with the first half, just use the bar to reach the second part, and then continue with the second half using the same methods as for the first. At some point, it should be possible to take the rim and pull it free.
Conclusion
As we have seen, removing the tire from the rim is not that hard to do. Naturally, some equipment is essential to do this in the proper way, but most of it is usually found in every household. With just a little effort, no one should have too many problems in accomplishing this task, which, sooner or later, everyone has to do.


