
A few years back, or a decade before, people used to love their furniture minimalist. But as seen today, people like to give their furniture a vintage look, shabby chic style. This trending style can be achieved by painting your furniture; You can achieve what you want yourself. Kalustofurniture.co.uk provides the best quality of wooden furniture. Online stores that give you various options.
What is Shabby Chic?
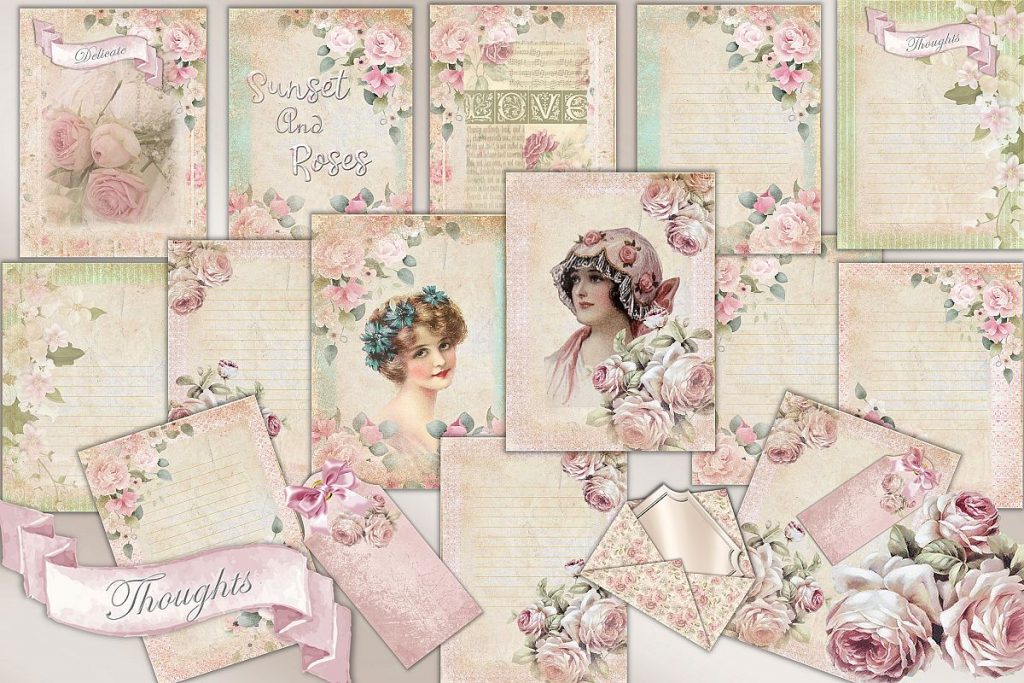
It is an interior plan where furniture and decorations are picked for their appearance old enough and indications of mileage or where new things are troubled to accomplish the presence of an antique. Simultaneously, a delicate, extravagant, yet house style decor, regularly with an influenced feel, is stressed to separate it from the certifiable period decor.
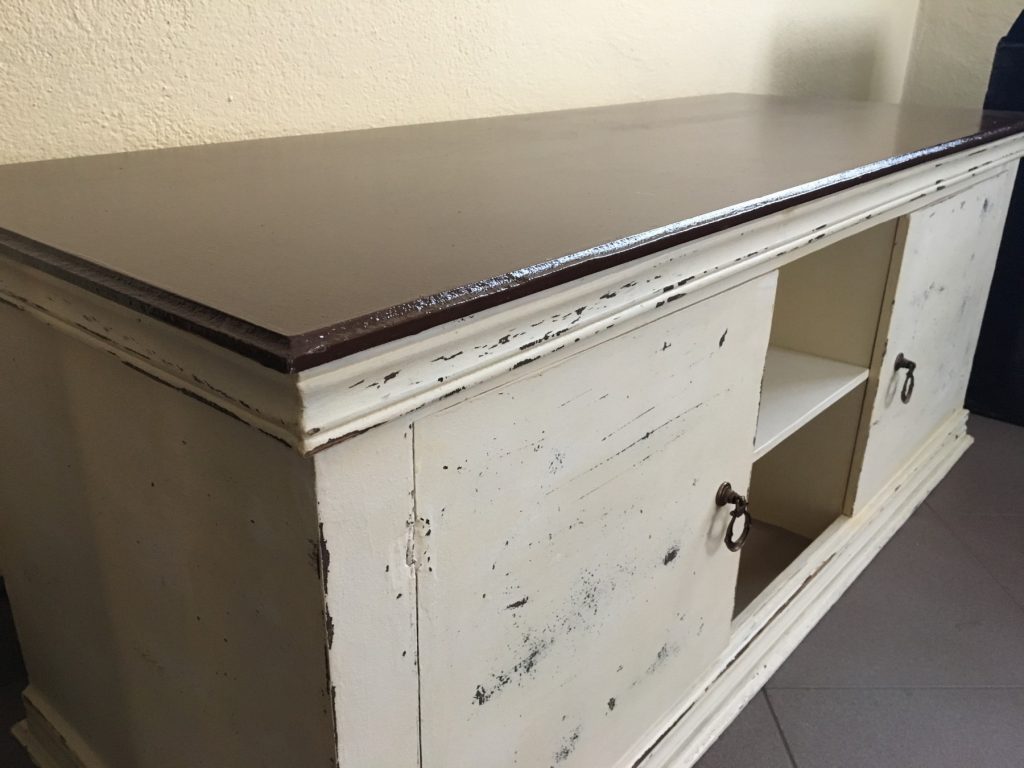
Shabby chic things are regularly painted as the years progressed, with numerous layers appearing through clearly old territories. The style is imitated in artificial painting utilizing coats or by painting at that point scouring and sanding away the top coat to show the wood or base coats, known as “upsetting” the completion of the furnishings.
Furniture pieces that are not authentic antiques are generally chosen for their likeness to more seasoned furniture styles and perhaps generation furniture with an upset completion. Expound furniture appliques portraying bloom loots and festoons, angels, and different themes might be added.
How to make your furniture look shabby chic?
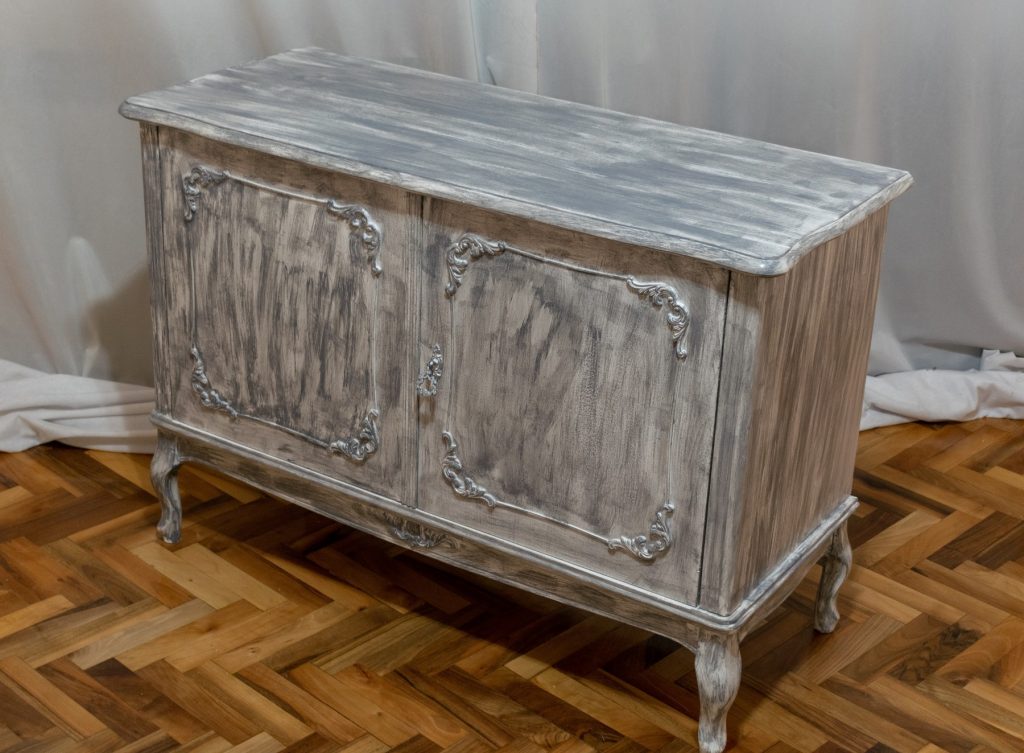
The sort and degree of the Shabby Chic look are especially down to individual inclination. For an inconspicuous matured look, stay with a solitary tone and tenderly distress the characteristic contact focuses like handles and edges to uncover spaces of exposed wood. For a more sensational impact, utilize 2, 3, or more layers of shading with the goal that various degrees of distress and wear and tear can be accomplished.
Firstly, you must get the things required
- A piece of wood furniture
- Furniture finishing wax
- A rag or any other clothing
- White spirit
- Sandpaper
- Masking tape or a painters tape
- Wire Wool
- Chalk Furniture Paint
- Mixing Sticks
- Rollers and Brushes of different sizes.
Before you Get Started
It would help if you had a plan before starting, without which it may lead to something which you would not have desired. Think in your mind how you want the finished furniture to look. You can choose your perfect look from different styles available on the internet. Buying paint and furniture without deciding and planning will lead to wastage of time and money.
It would be best if you also planned according to the other furniture or the look of your house so that the furniture you are planning to paint can fit in.
For example, you can paint the first layer with white and then paint it with wood colour brown to show the distress underlayer. You can also decide to show the distress down to the bare wood. There are so many options from where you have to choose before buying the paint.
Steps to Give Your Furniture Shabby Chic Look
Let’s look into the steps you need to follow to get the shabby chic look. The process of painting will differ with your plan, the type of paint you are using and the end result you want.
Step 1: Preparing the wood
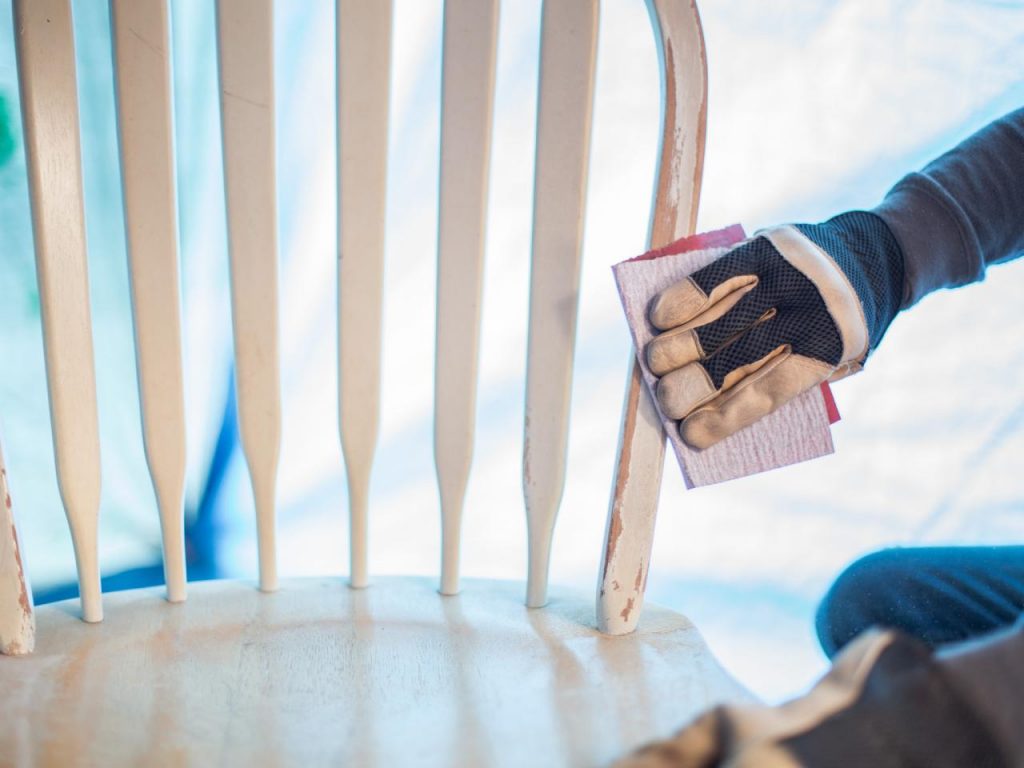
You first need to prepare the piece of furniture for painting. After that remove the existing wood finish so that your paint sticks well to the surface area. If the table you picked is wax polished, you need a pad of wire wool with white spirit or turps that will help you get the wax removed. If the furniture is varnished, it can be removed with sandpaper and varnish remover.
Step 2: Application of water-based acrylic primer
It will help if you put a coat of acrylic primer to get a smooth finish so that it is easy to work with. It’s okay if you are not a good painter and it is not neat. This is the best thing about getting a shabby chic look, you don’t have to be neat with your work, and you can have fun painting.
Step 3: Apply at least two paint layers
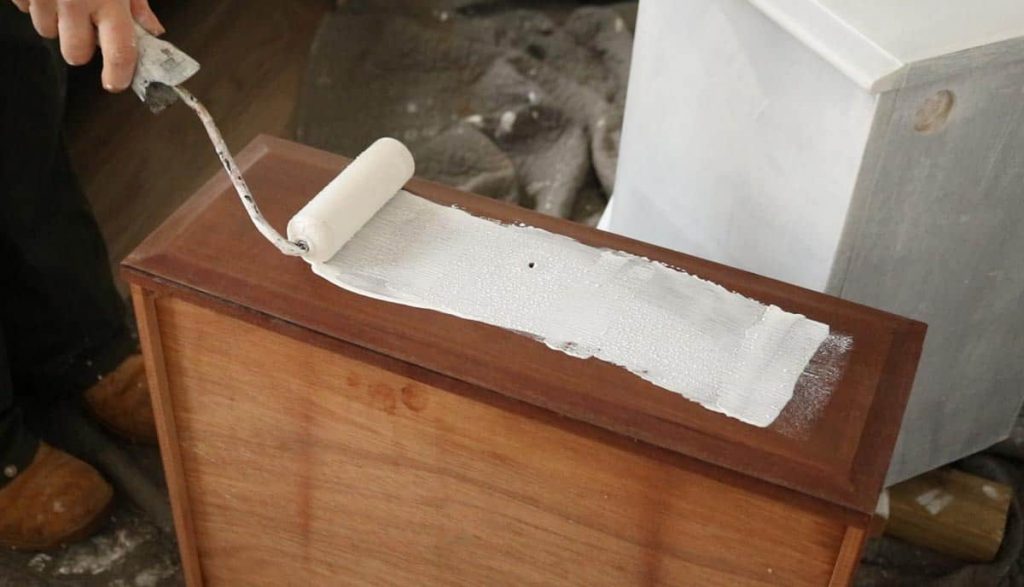
The next step is to paint the furniture with a thin layer of coloured acrylic paint. You need to put at least two layers to get the shabby look. It would help if you waited until the first layer dries and then can send the first layer gently with 180 fine-grit sandpaper to make the second layer application easy and neat. Sanding off is optional, but if you do it, you will get a better finish look.
Step 4: If you want simple plain painted furniture
If you want a plain simple wood look, you are almost done; you need to seal the acrylic paint and jump off to step 8 to complete the look. But if you desire to get a whole shabby distressed look in your furniture, you must carry on with the next step.
Step 5: Distress your painted furniture
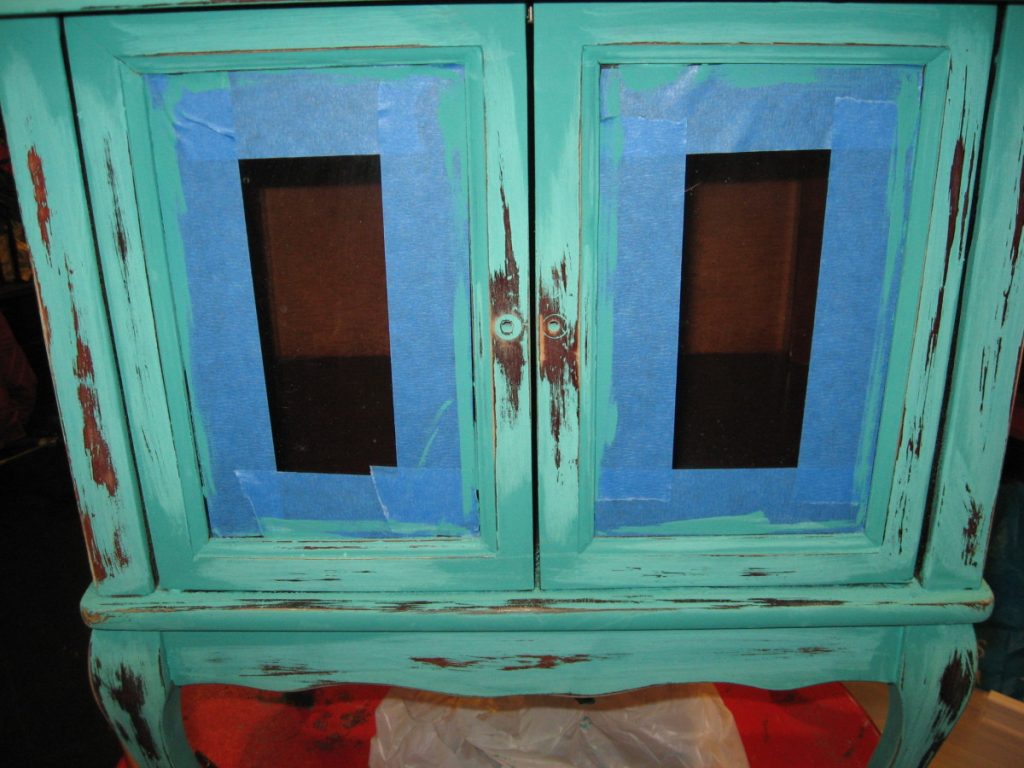
It’s time to start with distressing your old wooden furniture. To get the distressed look, step 1 and step 2 remain the same. You need a little change with step 3. To get a distressed look, you need to colour the furniture with two layers of different colours. It’s best to use water-based acrylic paints for this. After colouring the table with two different colour layers, you have to start rubbing away the second layer to show the first layer. This may look like a natural wear and tear process where the first layer is distressed.
Step 6: Applying Wax Before the second layer
Let the first layer of colour dry out completely, and then start applying wax to the areas where you want to give a distressed look. You can use the wax with a paintbrush, or kitchen sponge or even with your fingers. Let it dry, and then apply the second layer of paint. After the whole thing dries off, peel off the wax area. This will give a distressed shabby, and classy look to your interior furniture.
Step 7: Not satisfied with the look
If you want your furniture to look more shabby, you can always do it with sandpaper and wire wool. If you are still not satisfied, you can always repeat 5 and 6 with more layers of paint. Just remember not to create any pattern; it should look natural.
Step 8: The last step, complete it with applying a finish
The final step is to paint the whole thing and coat them with a clear wax polish. It gives a lovely lustre to your furniture and protects the wood if you have not used a varnish.


